Suddenly my newly created installer gave this error on the Virtual PC:
Please wait while the installer finishes determining your disk space requirements
I solved this by moving the file I added (and after which this error occurred) to another media file.
Add the second file after the first file:
<Media Id="2" Cabinet="SecondFile.cab" EmbedCab="yes"/>
And refer to this media file in the "File" element:
<File DiskId="2" ...
28 June 2009
Using WIX to create an installer: quickstart tutorial
WIX is an open source, Microsoft-sponsored wrapper to create an MSI setup.
Because I quickly need to create a setup for a small project, and could not find a quick tutorial how to do this, I record the steps in this post for future reference. The success of a framework depends on its ability to get its users up-and-running with only one page of "getting started" reading.
1. Download and install Wix 3.0
2. Add a new Wix setup project to your existing solution for which you want to create a setup.
3. Add a project reference to the existing project from the Wix installer project.
4. Begin with the boilerplate xml
5. Define the directories
6. Define contents of the application dir
7. Define the contents of the start menu folder:
8. Define the desktop shortcut
9. Tell installer to install the defined components
10. And close the XML nicely
11. Build the installer and test it.
The created installer is one without any userinterface. It just installs what is has been told to install and doesn't ask the user for anything.
Because I quickly need to create a setup for a small project, and could not find a quick tutorial how to do this, I record the steps in this post for future reference. The success of a framework depends on its ability to get its users up-and-running with only one page of "getting started" reading.
1. Download and install Wix 3.0
2. Add a new Wix setup project to your existing solution for which you want to create a setup.
3. Add a project reference to the existing project from the Wix installer project.
4. Begin with the boilerplate xml
<?xml version="1.0" encoding="UTF-8"?>
<Wix xmlns="http://schemas.microsoft.com/wix/2006/wi">
 <Product Id="(create a new guid here)" Name="(application name here)" Language="1033" Version="1.0.0.0" Manufacturer="(manifacturer name here)"
           UpgradeCode="(create a new guid here)">
  <Package InstallerVersion="200" Compressed="yes" />
  <Media Id="1" Cabinet="Media1.cab" EmbedCab="yes" />
5. Define the directories
    <Directory Id="TARGETDIR" Name="SourceDir">
      <-- Program Files/app name -->
      <Directory Id="ProgramFilesFolder">
        <Directory Id="ApplicationRootDirectory" Name="(application name here)"/>
      </Directory>
      <-- Start menu/programs/app name -->
      <Directory Id="ProgramMenuFolder">
        <Directory Id="ApplicationProgramsFolder" Name="(application name here)"/>
      </Directory>
      <Directory Id="DesktopFolder" Name="Desktop"/>
    </Directory>
6. Define contents of the application dir
    <DirectoryRef Id="ApplicationRootDirectory">
      <Component Id="ApplicationFile" Guid="(create guid here)">
        <File Id="ApplicationFile" Name="$(var.(project-to-install name).TargetFileName)"
              Source="$(var.(project-to-install name).TargetPath)" DiskId="1" KeyPath="yes"/>
      </Component>
      <Component Id="ConfigurationFile" Guid="(create guid here)">
        <File Id="ConfigurationFile" Name="$(var.(project-to-install name).TargetFileName).config" Source="$(var.(project-to-install name).TargetPath).config"
              DiskId="1" KeyPath="yes"/>
      </Component>
    </DirectoryRef>
7. Define the contents of the start menu folder:
    <DirectoryRef Id="ApplicationProgramsFolder">
      <Component Id="ApplicationShortcut" Guid="(create guid here)">
        <Shortcut Id="ApplicationStartMenuShortcut"
                  Name="(application name here)"
                  Description="(nice description here)"
                  Target="[ApplicationRootDirectory](assemblyname here).exe"
                  WorkingDirectory="ApplicationRootDirectory"/>
        <RemoveFolder Id="ApplicationProgramsFolder" On="uninstall"/>
        <RegistryValue Root="HKCU" Key="Software\Microsoft\(application name here)" Name="installed" Type="integer" Value="1" KeyPath="yes"/>
      </Component>
    </DirectoryRef>
8. Define the desktop shortcut
    <DirectoryRef Id="DesktopFolder">
      <Component Id="DesktopShortcut" Guid="(create guid here)">
        <CreateFolder/>
        <RegistryKey Root="HKCU" Key="(app name here)\Install" Action="createAndRemoveOnUninstall">
          <RegistryValue Name="Desktopshortcut" Value="1" Type="integer" KeyPath="yes"/>
        </RegistryKey>
        <Shortcut Id="ApplicationDesktopShortcut"
                  Name="(app name here)"
                  Description="(nice description here)"
                  Target="[ApplicationRootDirectory](assembly name here).exe"
                  WorkingDirectory="ApplicationRootDirectory"
                  />
      </Component>
    </DirectoryRef>
9. Tell installer to install the defined components
   <Feature Id="ProductFeature" Title="Main components" Level="1">
      <ComponentRef Id="ApplicationFile" />
      <ComponentRef Id="ConfigurationFile"/>
      <ComponentRef Id="ApplicationShortcut"/>
      <ComponentRef Id="DesktopShortcut"/>
    </Feature>
10. And close the XML nicely
  </Product>
</Wix>
11. Build the installer and test it.
The created installer is one without any userinterface. It just installs what is has been told to install and doesn't ask the user for anything.
23 June 2009
BackLinq quickstart tutorial
Since our clients still only have the .NET framework installed, there is no possibility to use LINQ in our projects.
Enter BackLinq.
BackLinq is a library that introduces the possibility to use Linq in NET 2.0 if you use VS2008 to compile the project.
1. Download the binary from the BackLinq website.
2. Change the target framework of the VS project to .NET 2.0 instead of .NET 3.5
3. Add a reference to BackLinq.dll to the project.
If the project is a C# project, things will now work as always, because BackLinq.dll adds its functionality into the System.Linq namespace.
If the project is a VB.NET project, you have to import the namespace System.Linq in the right places (=see the error pane), or add System.Linq to the Imported namespaces in the project properties.
4. Test the project and observe that azizatif did a good job.
22 June 2009
MSMQ versions
It seems that the MSMQ versioning will make it very hard to deploy an application in a large environment.
So... which MSMQ version should we use then? It seems that we have to build different versions of our application that use different versions of the MSMQ library to be compatible in both XP and Win2K environments. And how about mixed environments? If Win2K is on the server, and the client has XP?
Sigh.
EDIT: this reply from John Breakwell (MSFT)
Hi, the problem is not as bad as it seems. I regularly use test utilities on Windows 2008 that were written years ago. MSMQ should be backward-compatible - an application developed on MSMQ 2.0 should work fine on MSMQ 3.0. Doesn't mean you won't find any discrepancies, though, just like moving any Windows application to a newer platform. The usual practice of testing and recoding if necessary applies.
Note that here I am talking about compatibility with the application code. Compatibility between machines running different versions of MSMQ is much better. The format of the messages "on the wire" is the same across all versions (but see below) so you don't have to worry as long as you are sending the same type of messages.
Obviously you can't send a message over HTTP from a Windows XP client to a Windows 2000 server as the latter doesn't have that functionality. Standard MSMQ messages, though, should work between all versions.
There is one blemish on this with very large (~4MB) messages and that is discussed here.
MSMQ 2.0 was available with Windows 2000 & runs only on Windows 2000 platform.
MSMQ 3.0 comes with Windows 2003 and Windows XP.
So... which MSMQ version should we use then? It seems that we have to build different versions of our application that use different versions of the MSMQ library to be compatible in both XP and Win2K environments. And how about mixed environments? If Win2K is on the server, and the client has XP?
Sigh.
EDIT: this reply from John Breakwell (MSFT)
Hi, the problem is not as bad as it seems. I regularly use test utilities on Windows 2008 that were written years ago. MSMQ should be backward-compatible - an application developed on MSMQ 2.0 should work fine on MSMQ 3.0. Doesn't mean you won't find any discrepancies, though, just like moving any Windows application to a newer platform. The usual practice of testing and recoding if necessary applies.
Note that here I am talking about compatibility with the application code. Compatibility between machines running different versions of MSMQ is much better. The format of the messages "on the wire" is the same across all versions (but see below) so you don't have to worry as long as you are sending the same type of messages.
Obviously you can't send a message over HTTP from a Windows XP client to a Windows 2000 server as the latter doesn't have that functionality. Standard MSMQ messages, though, should work between all versions.
There is one blemish on this with very large (~4MB) messages and that is discussed here.
17 June 2009
Using MSMQ to communicate between .NET and VB6 applications
The try-out continues. In part 1 of my try-out, i succesfully installed MSMQ and setup a local queue. In part2 I was with some success able to setup communication between two different machines. In this part I will try to setup communication between a .NET application on computer 1 and a VB6 application on computer 2.
I did not use MSMQ in a VB6 application before, and there is surprisingly few documentation about it on the Bathroom Wall Of Code. But it is quite simple actually.
1. Create a new EXE project
2. Add a reference to "Microsoft Message Queue 3.0 Object Library"
3. Create a form with a button. In the button_click, add this (left out errorhandling and creation of the queue):
4. Test the exe: works on my machine. I can see a message appearing in the queue, using compmgmt.msc
Now I need a .NET exe that can receive the message and do something with it.
1. Create a new C# WPF exe project.
2. Add System.Messaging reference
3. Create a form with a ListView on it, which binds to an instance variable "ReceivedData":
4. Create the ReceivedData instance variable, which is of type System.Collections.ObjectModel.ObservableCollection<QueueData>:
And the QueueData class:
5. In the constructor, start listening to the queue. The Formatter should be an ActiveXMessageFormatter, because we are sending plain strings.
6. In the messageReceiver handler, add the received data to the listbox by updating the bound collection:
7. And clean up when the window is closed:
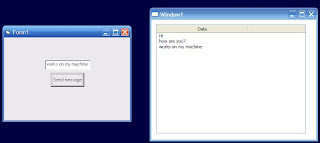
8. Try it out. And again, works on my machine:
Now that I have the two applications that I need, I will deploy one of them on another machine and see if the two applications will still be able to communicate.
1. Copy the VB6 exe to a virtual machine and try to send a message.
2. "The queue path name specified is invalid". That was caused by myself using the PathName property of the QueueInfo object. The PathName property only works on a local machine, but not on remote machines. I should have used FormatName (fixed in the example). I do not really see the logic behind these propertynames and it cost me quite some time to figure out what was wrong. If PathName is not able to specify remote paths, then why is it possible to include the server name in it? Well, maybe there is some use for it, for example in an AD setup.
3. try again with the fix. Don't forget to allow anonymous user on the queueu. After that, I see the message appear in the remote queue.
In the meantime I have set up another VirtualPC to find out what was wrong in step 2. The message queue that I use now, is on VPC1. VPC1 and VPC2 both have the VB6 client and are both able to write to the queue.
4. Install the WPF viewer application on VPC1 and start it: it reads and displays the messages from Vb6 client on both VPC1 and VPC2 correctly. Install same viewer on VPC2: now we created a race condition (2 WPF viewers processing messages from the same queue), but whatever: it works as well.
The last thing I want to be able to do, is send a message from the WPF application back to the VB6 exe.
1. In the VB6 form, create a Timer Timer1 which ticks every 1000 milliseconds.
2. Create an instance variable which holds another queue, initialize in Form_Load. The queue should have MQ_RECEIVE_ACCESS instead of MQ_SEND_ACCESS.
3. In the Timer1_Timer, wait for the message for 100 milliseconds and process the message if one arrived:
4. Create the queue on the computer where it should be and assign the anonymous user the proper rights.
In the WPF application should be updated to enable it to send a message in this new queue.
1. Add the same queue just added in the Vb6 app
2. Add a button. In the click handler:
Copy new exe's to VPC1 and VPC2. Start the vb6 exe, start the wpf exe and try: works on my machine.
Conclusion for now: MSMQ can be a very handy mechanism if you need to communicate between .NET and legacy VB6 applications. If there are problems, it is often not trivial to debug the problem. But on the other hand, it is a proven and mature technology, which implies a lot of knowledge and experience in the field.
I did not use MSMQ in a VB6 application before, and there is surprisingly few documentation about it on the Bathroom Wall Of Code. But it is quite simple actually.
1. Create a new EXE project
2. Add a reference to "Microsoft Message Queue 3.0 Object Library"
3. Create a form with a button. In the button_click, add this (left out errorhandling and creation of the queue):
 Dim q As MSMQQueue
 Dim msg As MSMQMessage
 With New MSMQQueueInfo
   .FormatName = "DIRECT:OS=COMPUTERNAME\Private$\QueueName"
   Set q = .Open(MQ_SEND_ACCESS, MQ_DENY_NONE)
 End With

 Set msg = New MSMQMessage
 msg.Label = "TestMessage"
 msg.Body = "I am here"
 msg.Send q

 q.Close
4. Test the exe: works on my machine. I can see a message appearing in the queue, using compmgmt.msc
Now I need a .NET exe that can receive the message and do something with it.
1. Create a new C# WPF exe project.
2. Add System.Messaging reference
3. Create a form with a ListView on it, which binds to an instance variable "ReceivedData":
<Window x:Class="Project.Window1"
        xmlns="http://schemas.microsoft.com/winfx/2006/xaml/presentation"
        xmlns:x="http://schemas.microsoft.com/winfx/2006/xaml"
        Title="Window1" Height="332" Width="417"
        DataContext="{Binding RelativeSource={RelativeSource Self}}">
    <Grid>
        <ListView HorizontalAlignment="Left" Margin="12,12,0,0" Name="listView1" VerticalAlignment="Top" ItemsSource="{Binding ReceivedData}" Height="270" Width="371">
            <ListView.View>
                <GridView>
                    <GridViewColumn  Header="Data" DisplayMemberBinding="{Binding Text}"  />
                </GridView>
            </ListView.View>
        </ListView>
    </Grid>
</Window>
4. Create the ReceivedData instance variable, which is of type System.Collections.ObjectModel.ObservableCollection<QueueData>:
        private ObservableCollection<QueueData> receivedData = new ObservableCollection<QueueData>();
        public ObservableCollection<QueueData> ReceivedData
        {
            get
            {
                return receivedData;
            }
        }
And the QueueData class:
    public class QueueData
    {
        public string Text { get; set; }
    }
5. In the constructor, start listening to the queue. The Formatter should be an ActiveXMessageFormatter, because we are sending plain strings.
        private MessageQueue q;
        public Window1()
        {
            InitializeComponent();

            q = new MessageQueue(@"FormatName:Direct=OS:COMPUTERNAME\private$\QueueName");
            q.Formatter = new ActiveXMessageFormatter();
            q.ReceiveCompleted += messageReceiver;
            q.BeginReceive();
        }
6. In the messageReceiver handler, add the received data to the listbox by updating the bound collection:
        private void messageReceiver(object sender, ReceiveCompletedEventArgs e)
        {
            try
            {
                var msg = q.EndReceive(e.AsyncResult);
                var contents = (string)msg.Body;
                Dispatcher.Invoke(new Action(addInfo), contents);
            }
            catch (Exception ex)
            {

                MessageBox.Show(ex.Message);
            }
            q.BeginReceive();
        }

        private void addInfo(string info)
        {
            ReceivedData.Add(new QueueData() { Text = info });
        }
7. And clean up when the window is closed:
        protected override void OnClosed(EventArgs e)
        {
            base.OnClosed(e);
            if (q != null) {
                q.ReceiveCompleted -= messageReceiver;
                q.Close();
            }
        }
8. Try it out. And again, works on my machine:

Now that I have the two applications that I need, I will deploy one of them on another machine and see if the two applications will still be able to communicate.
1. Copy the VB6 exe to a virtual machine and try to send a message.
2. "The queue path name specified is invalid". That was caused by myself using the PathName property of the QueueInfo object. The PathName property only works on a local machine, but not on remote machines. I should have used FormatName (fixed in the example). I do not really see the logic behind these propertynames and it cost me quite some time to figure out what was wrong. If PathName is not able to specify remote paths, then why is it possible to include the server name in it? Well, maybe there is some use for it, for example in an AD setup.
3. try again with the fix. Don't forget to allow anonymous user on the queueu. After that, I see the message appear in the remote queue.
In the meantime I have set up another VirtualPC to find out what was wrong in step 2. The message queue that I use now, is on VPC1. VPC1 and VPC2 both have the VB6 client and are both able to write to the queue.
4. Install the WPF viewer application on VPC1 and start it: it reads and displays the messages from Vb6 client on both VPC1 and VPC2 correctly. Install same viewer on VPC2: now we created a race condition (2 WPF viewers processing messages from the same queue), but whatever: it works as well.
The last thing I want to be able to do, is send a message from the WPF application back to the VB6 exe.
1. In the VB6 form, create a Timer Timer1 which ticks every 1000 milliseconds.
2. Create an instance variable which holds another queue, initialize in Form_Load. The queue should have MQ_RECEIVE_ACCESS instead of MQ_SEND_ACCESS.
3. In the Timer1_Timer, wait for the message for 100 milliseconds and process the message if one arrived:
Private Sub Timer1_Timer()

  Dim msg As MSMQMessage
  Set msg = Me.receiveQueue.Receive(WantDestinationQueue:=True, WantBody:=True, ReceiveTimeout:=100)

  If Not msg Is Nothing Then
    MsgBox CStr(msg.Body)
  End If

End Sub
4. Create the queue on the computer where it should be and assign the anonymous user the proper rights.
In the WPF application should be updated to enable it to send a message in this new queue.
1. Add the same queue just added in the Vb6 app
2. Add a button. In the click handler:
        private void button1_Click(object sender, RoutedEventArgs e)
        {
            outQueue.Send("WPF application says hi!");
        }
Copy new exe's to VPC1 and VPC2. Start the vb6 exe, start the wpf exe and try: works on my machine.
Conclusion for now: MSMQ can be a very handy mechanism if you need to communicate between .NET and legacy VB6 applications. If there are problems, it is often not trivial to debug the problem. But on the other hand, it is a proven and mature technology, which implies a lot of knowledge and experience in the field.
16 June 2009
Registration-free COM components try-out (continued)
As described in the previous post, I am trying out Side By Side (reg free) COM, trying to solve versioning and deployment issues we have with our software. In the previous post, I looked at VB6 and COM, this post is about my adventures with .NET and COM. The conclusion is: don't use the walkthrough as is, you won't be able to get a successful regfree installation.
Step 1 Read the walkthrough.
Step 2 Create the COM enabled .NET dll and the VB6 client app
Use Guid.NewGuid().ToString() to create GUIDs for the .NET assembly, class and interface if guidgen is not working for some reason. I created a new windows forms exe which copies a new Guid to the clipboard and exits. Start the vb6 exe to see if it works.
Step 3 unregister the .NET dll
with c:\windows\Microsoft.NET\Framework\v2.0.50727\regasm /u SideBySide.dll. Start the vb6 exe and see that it doesn't work any more.
Step 4 Create the manifest files for the dll and the client exe.
The example manifest in the walkthrough contains errors. FAIL. For example: //assemblyIdentity/@name=" SideBySide" should be "SideBySide", without the space. And //clrClass/@progid="SideBySide.SideBySide" should be "SideBySide.SideBySideClass".
Step 5 Do voodoo magic to embed the manifest into the dll
- Create a resource definition file which references the SideBySide.manifest file
- Create a build.cmd file which creates the resource file and compiles it into SideBySide.dll
Run build.cmd in a VS command prompt (%comspec% /k ""C:\Program Files\Microsoft Visual Studio 9.0\VC\vcvarsall.bat"" x86)
Step 6 Start client.exe
Now it should work... gaaah! Automation error!
Step 7 Take hours to troubleshoot
- The error is 80070002, which is supposed to mean "file not found". There are however no entries in the windows event log, and no entries in fuslogvw by which i could get a diagnosis of the problem.
- Googling on the error is not helpful.
- The assembly should have an embedded manifest. Open the file in VS, check: obviously has the right manifest file.
- Manifest files seem to be correct. But because the example in the walkthrough had errors, i feel uncertain about it.
- Because the dll has no version information if you view the properties in Windows Explore, i though that might have to do with the problem. I tried to embed the manifest using Visual Studio. After that, it works, but that is because "register for COM interop" was still checked. Regasm-ing /u and it won't work any more. The file still has no file version properties - but i'm not sure if that is a problem.
- Tried adding the interface to the manifest file also, still fails.
- Tried to build everything from scratch: same automation error occurs.
- I was thinking: we had issues with our own software that appeared after building VB6 exe's against .NET COM dll's and then rebuilding the COM dll's. That could be a problem, so i will test it: build the .NET dll with embedded manifest file and after that rebuild the vb6 exe. Still fails.
- Ok starting from scratch again.
- Tried all variations of the manifest files i could think of: Still fails with the automation error
Step 8 Give up for now.
I have no ideas left. Do some hopeless i-give-up-but-i-dont-want-to-admit-it-browsing and hey, a tool to generate the manifest files instead of having to make them yourself. The tool is called genman32, and is made by Junfeng Zhang, who has some articles about SxS / RegFree com.
Step 9 Having new hope, try again with the genman32 tool
The tool generates a manifest using reflection and is able to embed it in the dll. The generated manifest is unfortunately not correct.. But i could correct the errors and then use the tool to embed the corrected manifest.
- Create manifest with "genman32 <dll>"
- Correct the manifest (<dll>.manifest): Remove /assembly/assemblyIdentity/@processorArchitecture and add /assembly/assemblyIdentity/@type='win32'.
- Embed the manifest in the dll with "genman32 <dllname> /add /manifest:<manifestname>
Step 10 Start the Vb6 exe
Ha! Now it works!! Double check by regasm-ing /u the assembly... still works!! The only difference with my "manual" tries is that the dll now has version information embedded as well. It seems that having this version information is not optional. The manual process described in the walkthrough removes this information, while the genman32 tool preserves it (which is compiled into the dll by Visual Studio automatically).
The document "Registration-Free Activation of .NET-Based Components: A Walkthrough" is not correct and it cost me time and frustration. And i am probably not the only person with this experience. I will provide this story as feedback on the article and i hope the article will be corrected.
But apart from that, the good news is: I do have a way of using .NET COM components in VB6 regfree. I should try this with .NET OCX files too...
.NET and COM
Step 1 Read the walkthrough.
Step 2 Create the COM enabled .NET dll and the VB6 client app
Use Guid.NewGuid().ToString() to create GUIDs for the .NET assembly, class and interface if guidgen is not working for some reason. I created a new windows forms exe which copies a new Guid to the clipboard and exits. Start the vb6 exe to see if it works.
Step 3 unregister the .NET dll
with c:\windows\Microsoft.NET\Framework\v2.0.50727\regasm /u SideBySide.dll. Start the vb6 exe and see that it doesn't work any more.
Step 4 Create the manifest files for the dll and the client exe.
The example manifest in the walkthrough contains errors. FAIL. For example: //assemblyIdentity/@name=" SideBySide" should be "SideBySide", without the space. And //clrClass/@progid="SideBySide.SideBySide" should be "SideBySide.SideBySideClass".
Step 5 Do voodoo magic to embed the manifest into the dll
- Create a resource definition file which references the SideBySide.manifest file
- Create a build.cmd file which creates the resource file and compiles it into SideBySide.dll
Run build.cmd in a VS command prompt (%comspec% /k ""C:\Program Files\Microsoft Visual Studio 9.0\VC\vcvarsall.bat"" x86)
Step 6 Start client.exe
Now it should work... gaaah! Automation error!
Step 7 Take hours to troubleshoot
- The error is 80070002, which is supposed to mean "file not found". There are however no entries in the windows event log, and no entries in fuslogvw by which i could get a diagnosis of the problem.
- Googling on the error is not helpful.
- The assembly should have an embedded manifest. Open the file in VS, check: obviously has the right manifest file.
- Manifest files seem to be correct. But because the example in the walkthrough had errors, i feel uncertain about it.
- Because the dll has no version information if you view the properties in Windows Explore, i though that might have to do with the problem. I tried to embed the manifest using Visual Studio. After that, it works, but that is because "register for COM interop" was still checked. Regasm-ing /u and it won't work any more. The file still has no file version properties - but i'm not sure if that is a problem.
- Tried adding the interface to the manifest file also, still fails.
- Tried to build everything from scratch: same automation error occurs.
- I was thinking: we had issues with our own software that appeared after building VB6 exe's against .NET COM dll's and then rebuilding the COM dll's. That could be a problem, so i will test it: build the .NET dll with embedded manifest file and after that rebuild the vb6 exe. Still fails.
- Ok starting from scratch again.
- Tried all variations of the manifest files i could think of: Still fails with the automation error
Step 8 Give up for now.
I have no ideas left. Do some hopeless i-give-up-but-i-dont-want-to-admit-it-browsing and hey, a tool to generate the manifest files instead of having to make them yourself. The tool is called genman32, and is made by Junfeng Zhang, who has some articles about SxS / RegFree com.
Step 9 Having new hope, try again with the genman32 tool
The tool generates a manifest using reflection and is able to embed it in the dll. The generated manifest is unfortunately not correct.. But i could correct the errors and then use the tool to embed the corrected manifest.
- Create manifest with "genman32 <dll>"
- Correct the manifest (<dll>.manifest): Remove /assembly/assemblyIdentity/@processorArchitecture and add /assembly/assemblyIdentity/@type='win32'.
- Embed the manifest in the dll with "genman32 <dllname> /add /manifest:<manifestname>
Step 10 Start the Vb6 exe
Ha! Now it works!! Double check by regasm-ing /u the assembly... still works!! The only difference with my "manual" tries is that the dll now has version information embedded as well. It seems that having this version information is not optional. The manual process described in the walkthrough removes this information, while the genman32 tool preserves it (which is compiled into the dll by Visual Studio automatically).
Conclusion
The document "Registration-Free Activation of .NET-Based Components: A Walkthrough" is not correct and it cost me time and frustration. And i am probably not the only person with this experience. I will provide this story as feedback on the article and i hope the article will be corrected.
But apart from that, the good news is: I do have a way of using .NET COM components in VB6 regfree. I should try this with .NET OCX files too...
Registration-Free COM components try-out
We have both .NET components and VB6 legacy apps. We created a communication layer between the two, both ways, using COM interop.
Unfortunately, this breaks the xcopy install for our .NET software. And introduces unexpected and nasty versioning issues.
Enter reg-free com. This might solve some of these issues. Updating is reduced to copying a new version of the dll, and it even makes possible that different versions of one COM server exist side-by-side (which happened to be the reason behind this technology in the first place).
I record my adventures using registration free COM on this blog for future reference.
Step 1 Read the walkthrough.
Step 2 Create the COM and client applications
Step 3 regsvr32 /u sidebyside.dll
And notice that the client exe will now fail.
Step 3 Create manifest files
which hold the information that makes XP find the COM server without the registry.
To know by which GUIDs the component is known, the OLE/COM object viewer is a very nice tool. It can be downloaded from the Microsoft site. The download does not include an essential dll, iviewers.dll, (obviously this has not been tested thoroughly), which can be downloaded from this location. After install, your system has not been polluted with shorcuts to any exe whatsoever, and the program can be found at this intuitive location: "%ProgramFiles%\Resource Kit"
I created a sendto command to drop the dll's onto the exe, which will then show you the information you need.
The "walkthrough" does not walk me through which GUID maps to what attribute in the xml file, but my guessing was right:
/assembly/file/comClass/@clsid maps on the uuid on "coclass SideBySideClass"
/assembly/file/typeLib/@tlbid maps on the uuid on "library SideBySide" (topmost uuid)
/assembly/comInterfaceExternalProxyStub/@iid maps on uuid on "interface _SideBySideClass : IDispatch"
/assembly/comInterfaceExternalProxyStub/@tlbid is the same as /assembly/file/typeLib/@tlbid
Step 4 Start the client exe and celebrate that it works for VB6 exe to COM dll.
Tomorrow: .NET and COM.
Unfortunately, this breaks the xcopy install for our .NET software. And introduces unexpected and nasty versioning issues.
Enter reg-free com. This might solve some of these issues. Updating is reduced to copying a new version of the dll, and it even makes possible that different versions of one COM server exist side-by-side (which happened to be the reason behind this technology in the first place).
I record my adventures using registration free COM on this blog for future reference.
VB6 and COM
Step 1 Read the walkthrough.
Step 2 Create the COM and client applications
Step 3 regsvr32 /u sidebyside.dll
And notice that the client exe will now fail.
Step 3 Create manifest files
which hold the information that makes XP find the COM server without the registry.
To know by which GUIDs the component is known, the OLE/COM object viewer is a very nice tool. It can be downloaded from the Microsoft site. The download does not include an essential dll, iviewers.dll, (obviously this has not been tested thoroughly), which can be downloaded from this location. After install, your system has not been polluted with shorcuts to any exe whatsoever, and the program can be found at this intuitive location: "%ProgramFiles%\Resource Kit"
I created a sendto command to drop the dll's onto the exe, which will then show you the information you need.
The "walkthrough" does not walk me through which GUID maps to what attribute in the xml file, but my guessing was right:
/assembly/file/comClass/@clsid maps on the uuid on "coclass SideBySideClass"
/assembly/file/typeLib/@tlbid maps on the uuid on "library SideBySide" (topmost uuid)
/assembly/comInterfaceExternalProxyStub/@iid maps on uuid on "interface _SideBySideClass : IDispatch"
/assembly/comInterfaceExternalProxyStub/@tlbid is the same as /assembly/file/typeLib/@tlbid
Step 4 Start the client exe and celebrate that it works for VB6 exe to COM dll.
Tomorrow: .NET and COM.
MSMQ continued
Created a simple server app, which creates the queue if instructed, and sends a message down the line. Also created a client app, which listenes to a queue and displays the string message. This works if used on the same machine. But how will it work if i deploy it to another machine?
Step 1: try to make the client app work with the queue name FormatName:Direct=TCP:<ip>\private$\<queuename>
Client app fails on the local machine when I use the ip address that is assigned this computer, but the client app succeeds if I use the loopback address 127.0.0.1
Step 2: copy the client app to a virtual machine that has access to the host machine.
Step 3: start the client, pointing it to the queue on the host machine.
Ouch!!
InvalidOperationException occurred: Message Queuing has not been installed on this computer.
I was silently hoping that Message Queuing would not have to be installed on client machines. In our situation we may have hundreds of client computers that will need this installation. Would there be another way of deploying MSMQ?
Step 4: read about deployment in the FAQ.
Some quotes:
And lots of cryptic error message with their explanations. If a solution requires a 133 page Word document for FAQ alone... what will it be like to work with MSMQ in the field? Looks like a horror scenario to me. Imagine getting this message from a client: "Unsupported option at CQ2QMsgF::QMsg, at (or near) line 2323". Or: "Message Queuing may function in an unpredictable fashion". How about this prose: "This error [MQ_ERROR_INSUFFICIENT_RESOURCES] can be returned by several APIs. It has several (unrelated) reasons"
The document does not answer my question so far. But this discussion seems to do. It involves a nicely formatted batch file which also acts as a configuration file for the installation that it invokes. The file should be named MSMQsetup.bat.
Step 5: try out the magic batch file on my VM
Ha! it works: installation completed successfully.
Step 6: start my client app again
MessageQueueException occurred: The queue does not exist or you do not have sufficient permissions to perform the operation.
Bad UX from developer point of view: this error message does not give you very much information about how to solve this. But OK, that's what we get paid for: to solve problems that we or other developers create. So:
Step 7: Try out if settings the appropriate permissions on the queue solves the issue.
There are 2 ways to do this: 1) programmatically, 2) by starting compmgmt.msc > services > messsage queuing > private queues > right click on appropriate queue > properties and set permissions.
Setting the permissions programmatically would involve something like this:
The "Iedereen" string is Dutch for "Everyone", which obviously is translated to the language of the OS. Very handy. I could not find a (programmatic) way to find out how the "Everyone" group is called on the local machine. But anyway, you would want to configure that and don't want to put that hard-coded in you app.
Step 8: Start the client app again on the VM
Still not working. Set the ANONYMOUS_LOGON permissions to Full Control. Still not working. Could be something with the VM / Host communication. So created the queue on the VM, tried to connect from host. Not helping.
OK I don't have a clue anymore about what could be the problem.
Try something else.
Not
FormatName:Direct=TCP:<ip>\private$\<queuename>
But
FormatName:Direct=OS:<hostname>\private$\<queuename>
Step 9: Start "server" app on host machine, "client" app on VM...
Eureka, it's working now.
Whatever.
Remove permissions for ANONYMOUS_LOGON:
Aha! A different error message:
MessageQueueException occurred: Access to Message Queuing system is denied.
So the problem with the TCP is yet unresolved, but I do have a working remote queue installation now.
By the way. The server app:
The client app:
Step 1: try to make the client app work with the queue name FormatName:Direct=TCP:<ip>\private$\<queuename>
Client app fails on the local machine when I use the ip address that is assigned this computer, but the client app succeeds if I use the loopback address 127.0.0.1
Step 2: copy the client app to a virtual machine that has access to the host machine.
Step 3: start the client, pointing it to the queue on the host machine.
Ouch!!
InvalidOperationException occurred: Message Queuing has not been installed on this computer.
I was silently hoping that Message Queuing would not have to be installed on client machines. In our situation we may have hundreds of client computers that will need this installation. Would there be another way of deploying MSMQ?
Step 4: read about deployment in the FAQ.
Some quotes:
"I want to configure a central queue on a Message Queuing server and have multiple remote clients read from it. Is this a good design? [..leave out some shades of gray...] No."
"The supporting server should be running the same (or later) Message Queuing version as the dependent client"
"Message Queuing does not scale well with multi-CPU computers"
And lots of cryptic error message with their explanations. If a solution requires a 133 page Word document for FAQ alone... what will it be like to work with MSMQ in the field? Looks like a horror scenario to me. Imagine getting this message from a client: "Unsupported option at CQ2QMsgF::QMsg, at (or near) line 2323". Or: "Message Queuing may function in an unpredictable fashion". How about this prose: "This error [MQ_ERROR_INSUFFICIENT_RESOURCES] can be returned by several APIs. It has several (unrelated) reasons"
The document does not answer my question so far. But this discussion seems to do. It involves a nicely formatted batch file which also acts as a configuration file for the installation that it invokes. The file should be named MSMQsetup.bat.
;@ECHO OFF
;sysocmgr.exe /i:sysoc.inf /u:MSMQsetup.bat
;GOTO Finished
[Components]
msmq_Core = ON
msmq_LocalStorage = ON
msmq_ADIntegrated = ON
msmq_TriggersService = ON
msmq_HTTPSupport = OFF
msmq_RoutingSupport = OFF
msmq_MQDSService = OFF
;:Finished
Step 5: try out the magic batch file on my VM
Ha! it works: installation completed successfully.
Step 6: start my client app again
MessageQueueException occurred: The queue does not exist or you do not have sufficient permissions to perform the operation.
Bad UX from developer point of view: this error message does not give you very much information about how to solve this. But OK, that's what we get paid for: to solve problems that we or other developers create. So:
Step 7: Try out if settings the appropriate permissions on the queue solves the issue.
There are 2 ways to do this: 1) programmatically, 2) by starting compmgmt.msc > services > messsage queuing > private queues > right click on appropriate queue > properties and set permissions.
Setting the permissions programmatically would involve something like this:
  createdQueueu.SetPermissions(
    new MessageQueueAccessControlEntry(
      new Trustee("Iedereen"),
      MessageQueueAccessRights.FullControl));
The "Iedereen" string is Dutch for "Everyone", which obviously is translated to the language of the OS. Very handy. I could not find a (programmatic) way to find out how the "Everyone" group is called on the local machine. But anyway, you would want to configure that and don't want to put that hard-coded in you app.
Step 8: Start the client app again on the VM
Still not working. Set the ANONYMOUS_LOGON permissions to Full Control. Still not working. Could be something with the VM / Host communication. So created the queue on the VM, tried to connect from host. Not helping.
OK I don't have a clue anymore about what could be the problem.
Try something else.
Not
FormatName:Direct=TCP:<ip>\private$\<queuename>
But
FormatName:Direct=OS:<hostname>\private$\<queuename>
Step 9: Start "server" app on host machine, "client" app on VM...
Eureka, it's working now.
Whatever.
Remove permissions for ANONYMOUS_LOGON:
Aha! A different error message:
MessageQueueException occurred: Access to Message Queuing system is denied.
So the problem with the TCP is yet unresolved, but I do have a working remote queue installation now.
By the way. The server app:
using System;
using System.Collections.Generic;
using System.Linq;
using System.Text;
using System.Messaging;

namespace ServerApp
{
    class Program
    {
        static void Main(string[] args)
        {
            if (args.Length < 1)
            {
                Console.WriteLine("Usage: ServerApp <queue> [create]");
                Console.WriteLine("  Will send a message \"Hallo!\" down the line.");
                Console.WriteLine("  Specifying the \"create\" command will create the queue.");
                return;
            }

            var queueName = args[0];

            try
            {
                using (var q = (args.Length == 2 ? MessageQueue.Create(queueName) : new MessageQueue(queueName)))
                {
                    q.Formatter = new XmlMessageFormatter(new Type[] { typeof(String) });
                    q.Send("Hallo!");
                    Console.WriteLine("Message sent");
                }
            }
            catch (Exception e)
            {
                Console.WriteLine(e.GetType().Name + " occurred. " + e.Message);
            }
        }
    }
}]]>
The client app:
using System;
using System.Collections.Generic;
using System.Linq;
using System.Text;
using System.Messaging;

namespace ClientApp
{
    class Program
    {
        static void Main(string[] args)
        {
            if (args.Length < 1)
            {
                Console.WriteLine("usage: ClientApp <queuename>");
                Console.WriteLine("  reads 1 message from the given queue");
                return;
            }

            var queueName = args[0];

            try
            {
                using (MessageQueue q = new MessageQueue(queueName))
                {
                    q.Formatter = new XmlMessageFormatter(new Type[] { typeof(String) });
                    Console.WriteLine("Waiting for message...");
                    Console.WriteLine("Received message: " + (string)q.Receive().Body);
                }
            }
            catch (Exception e)
            {
                Console.WriteLine(e.GetType().Name + " occurred: " + e.Message);
            }
        }
    }
}
15 June 2009
MSMQ try-out
MSMQ (Microsoft Message Queuing) seems like a powerful thing:
- Transactional
- Robust
- Works with both COM (vb6!) and .NET
So I decided I should at least know how it works and how I can use it in a project. There are nice .NET wrappers around it, abstracting it away, like NServiceBus, but I should know how it works anyway before using any framework.
Step 1: try out an example from The Bathroom Wall Of Code
Failed. "MSMQ is not installed on this machine". It needs an install of an extra windows component! FAIL! How can I ever use this on my server that is managed by Mordac? Note to self: try out Ayende's Rhino Queues, xcopy install, with no dependency on MSMQ.
Step 2: install MSMQ
Software > Add Windows Component > MSMQ > Installation failed for unclear reasons. Some searching revealed that I had to reset the Distributed Transaction Log by some obscure command. Should of course have thought of that before trying the install. Retry install: fail again. This component has been registered for removal. Ok. Restart machine. Retry again. Now it installs.
Update: John Breakwell blogged about the details and solution of this problem here.
Update: John Breakwell blogged about the details and solution of this problem here.
Step 3: Make the queue
MessageQueue q = MessageQueue.Create(@".\Private$\TestQueue");
Step 4: create and configure the queue in 2 applications
MessageQueue q = new MessageQueue(@".\Private$\TestQueue");
q.Formatter = new XmlMessageFormatter(new Type[] { typeof(String) });
Step 5: send message from application 1
q.Send("hi!", "message");
Step 6: receive the message in application 2
Console.WriteLine((string)q.Receive().Body);
Step 7: Watch it work.
Subscribe to:
Posts (Atom)